2016年7月6日 星期三

Oracle on Nutanix ABS (Acropolis Block Service)


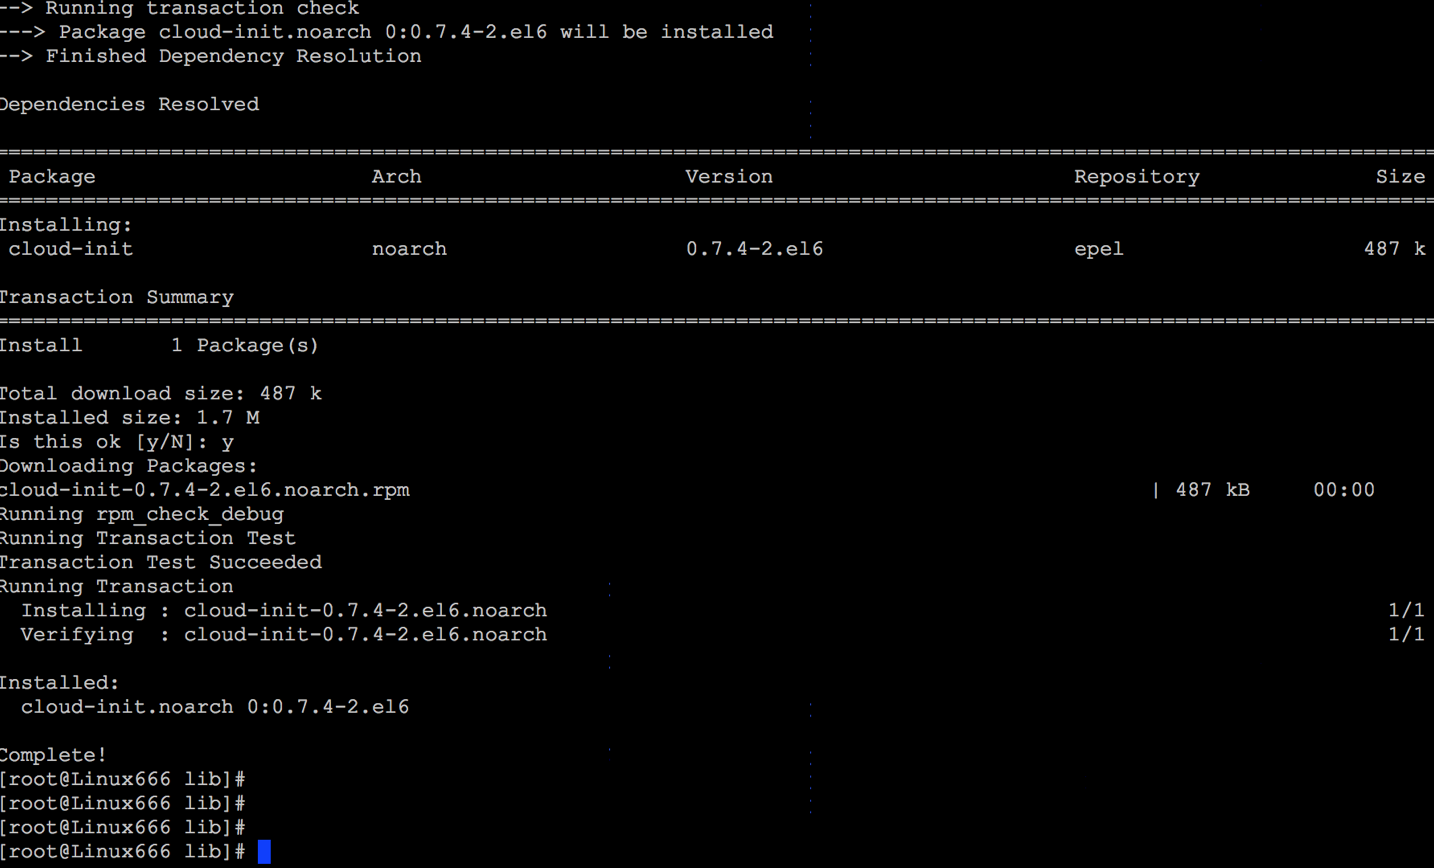
     Nutanix already release 4.7 last week when .NEXT event.  There are some new features that AOS 4.7 announced. Today , I upgrade my Nutanix NX-1465G4 AOS to version 4.7. The most exciting function I want to test is ABS. 

      I worked for EMC for 7 years. I knew all about SAN, iSCSI, NAS storage. When I was in EMC solution center , I need to maintain all demo environment. I have two brocade SAN switches, two MCdata and one MDS SAN switches. What’s trouble me is the zoning configurations . I need to maintain hundreds of zoning configuration. I need to check WWPN by myself. If something wrong , my demo servers won’t see its’ LUNs. Some of the demo environments will be infected . 

     After iSCSI storage come out , thing’s got easier. I didn’t need to maintain zoning information again. But I still need to take care about multi-path.  I need redundant paths to prevent one of the NICs failed. If I have two NICs in my server and I also have a iSCSI storage with two controller with two front-end ports . One LUN I may get 4-8 paths. So I need some MPIO to help me to manage those paths.  In EMC , will use Powerpath to manage multi-path. 

     Everything seems good , we have multiple path solutions ? But sometimes customers will ask do not install any software (Powerpath, DMP ….) on my servers. Then just one way to resolve this issue , using Native MPIO. 

   This issue just view from the front-end side . In the backend , VNX or other storage . They have active/passive configuration for a LUN. So you need to rebalance the LUNs in the back-end . When I was in VMware , I went an customer site in China . They complained about performance is sucks in VMware. When I check their EMC storage , I found all of their LUNs just using SPA as active , and SPB is standby. 

    Those issues are traditional SAN/iSCSI problem. Until now, traditional storages design still like this. 
   When Nutanix come out the ABS (Acropolis Block Services), I’m wondering why my company go back to support iSCSI SAN solution? Everyday we talked the disadvantage about SAN , and we go support physical servers connect to Nutanix.  After I check Josh Odgers blog ( http://www.joshodgers.com/2016/06/15/whats-next-2016-acropolis-block-services-abs/ ) article about ABS.  We made all iSCSI connections easier and simple then before.  All the ABS internal working knowledge are there. If you have any interesting in ABC, please go Josh Odgers blog.

   My role in Nutanix is BCA (Business Critical Application) , my responsibility is make sure all BCA can run well in Nutanix platform .  The first come to my mind is “high availability” . Most of my customers when they migrate their BCA to Nutanix , the first question is HA. Do Nutanix ABS provide high availability protection ? When the node failed, do Nutanix ABC can failover its LUNs to another node ? The answer is yes . 

   So I did this testing and using Oracle database as my critical application.  
Here is my testing spec- 
   - Nutanix NX-1465G4 with 256 GB RAM each node (Total 4 Nodes)
   - Oracle Linux 6.7 with Oracle 12c Installed
   - Oracle database using ASM configuration 
   - Nutanix AOS 4.7 
   - Swingbench (generate Oracle database loading) 

Scenario 1- Simulated one node failed (failover)
   I was running Swingbench with 300 users connection to generate load. When swingbench TPS keep stable running, then I shutdown Node D. You can see following video , there is no any error generate from swingbench . All the connections are still working fine. There is a short CPU IO wait when failover just few seconds. Node D’s LUN failover to Node A.


Scenario 2 - Simulated fail node back to cluster (failback) 
 Using scenario 1, I power-on the Node D. Simulate the Node D is repaired and join cluster again. You will see ABS will automatic fail back LUN from Node A to Node D. The loading will rebalance between nodes.


Conclusion- 
    ABS make iSCSI simple, and support physical machines connect. It reduce the multi-path issue in traditional iSCSI storage and also automatically load balance between nodes. 
When I shutdown Node D, it’s LUN failover to Node A. This make node A more loads. So you can see the response time and CPU IO wait is changed . But after Node D join back , the performance running as before. That means we can scale-out when your BCA need more I/O or more quick response time. Not like traditional storage , when you have bottleneck in controllers , you need to replace all the storage. Nutanix ABS will be your best iSCSI storage for your critical application. Make simple is the key to success !!

 Albert Chen 2016/07/06  

2016年4月25日 星期一

How to use Nutanix Prism deploy Business Critical Application


How to use Nutanix Prism deploy Business Critical Application


          Recently , Nutanix had announced a new NOS release 4.6 . One of the function is customized script to deploy your virtual machine .
In the Windows guest environment is very easy to prepared . We can use sysprep to deploy Windows guest OS . In Linux guest OS , we using cloud-init package to deploy.
         You can reference Chris Rasmussen site .
http://digitalformula.net/articles/nutanix-vm-customisation-with-cloud-init/
          Most of the steps are same, but some of configuration must be noted.
I use Oracle database and Oracle linux as a example . Oracle version is 11.2.0.4 , Oracle Linux is version 6.7.  Nutanix Acropolis Prism is 4.6.0.2 and we use Acropolis Hypervisor (AHV).


Step 1: Prepare your template image -


      First , we need to create a OS template that for deployment in your environment .  You can install a clean Linux OS environment or just clone from virtual machine. due to Linux OS always assign a new virtual NIC to new virtual machine. So you need to delete the /etc/udev/rules.d/70-persistent-net.rules .  Otherwise , you will have eth1,eth2 ,eth3 ... everytime you clone you get increase number . If you removed this file, after you clone virtual machine  . Linux OS will not increase the ethx number , will keep using eth0 .
     Secondary , you need to install the cloud-init package. Every Linux installation methods maybe not same . Some will use apt , some will use yum . Here is a example that install cloud-init package in Oracle Linux or RedHat, Centos .

  example :

wget http://dl.fedoraproject.org/pub/epel/6/x86_64/epel-release-6-8.noarch.rpm
rpm -Uvh epel-release-6-8.noarch.rpm

yum install cloud-init


After installation , just leave everything default . Do not need to configure any setting .Because Nutanix Prism will help everything we need . Simplified cloud-init package setting .
The you need to put your Oracle installation binary in the OS , and also prepare auto-install script .  I create a simple one, and you can reference this. ( Not only Oracle have automatic installation , but also all Business Critical Application have it's owned automatic/silence installation method , you can script them easily)


From my example  - The script I created is called install_demo.sh. After steps , you can shutdown the virtual machine , and start put it into image service .

Step 2 : Create Image for deployment 


Nutanix Acropolis 4.6 provide upload image , you can upload image from the Prism GUI. 


            But if your virtual machine is on the AHV, you don't need to export and import again . Just using single commend to put your image into image service . We will use acli commend to put image into repository. command like this :
image.create autodeploy_oracle clone_from_vmdisk=vm:Goldmaster:scsi.0
** autodeploy_oracle is template name 
** Goldmaster:scsi.0 mean Goldmaster VM it's first scsi disk .


This command is take 1 second to finish . Go back to Prism check the image is successful installed.

Step 3: Deployment your Business Critical Application ( Oracle for ex , others same method)

     First you need to create a new VM- In the Prism , select the VM tab, and start to create a VM.


Give the CPU and Memory values - 


Add disk - Choose Operation , select "CLONE FROM IMAGE SERVICE" ,and select the image "autodeploy_oracle" the template we created.


Add the new NIC -


The key is "Custom Script" , Here are three options we can choose.  "ADFS" or "upload a file" or "Type or paste script". This time we use "Type or paste script". Because we need to change hostname and run the customized scripts. 


Type those text in the text box .

#cloud-config
disable_root: 0
ssh_pwauth:   1
hostname: Oracle112
runcmd:
- [/root/install_demo.sh,once-per-instance] 


Click Save , and wait for 100% create process . Must wait for 100 % ,otherwise you will get a failed ....


Step 4: Power on your VM - 


Just select power-on your Virtual Machine, also open your console . you will see the cloud-init is running. That means will change my hostname , and also automatic install Oracle binary and create database for me . 


I also put all process avi in this blog , you can reference . 


Conclusion :

   
    From my 19 years IT experience , when I talked to customers, they don't want a complicated solutions . They just want some simple and handle their daily job. 
   Some software they create too many object like blueprint , endpoint .. Really complicated solution. Some vender also mentioned they can deploy 10000 VMs in 10 minutes.  I think , in real world , we don't need this kind of software , because we didn't need deploy 10000 VMs everyday or need very complicated processes to deploy a VM .  Nutanix Prism already can help on your daily job to deploy those application for you. Make your life easier. 


2015年6月21日 星期日

How to install Nutanix CE into ESXi 6.0

How to install Nutanix CE into ESXi 6.0

             Nutanix announce a CE edition and could download from The newest version is ce-2015.06.08-beta.img.gz. If you want install it into ESXi 6.0 , please use this version. So what we need to prepare ? Please reference here Joep wrote for install on the Fusion. Website is here

http://www.virtuallifestyle.nl/2015/06/nextconf-running-nutanix-community-edition-nested-on-fusion/

             But I found some tips we need to know when we installed into ESXi. My idea is put three nodes into one ESXi server. My X86 Server with 32 GB RAM, 480 SSD and 2 TB Seagate HDD. Let's start installing Nutanix CE into ESXi 6.0

 1. ESXi 6.0 Installed - I think I will skip how to install the ESXi 6.0 and vCenter 6.0, you can find many documents talking about how to install VMware software .


 2. Create VM - From the beginning , I thought in a nest environment . So I choose the VM type as ESXi6 . But I got kernel panic when I tried to install Nutanix CE. Then suddenly I think Nutanix original base is linux base, so I choose Centos4/5/6 as my VM OS type . Then the kernel panic issue gone. At least 4 vCPU and 16 GB RAM.


Please also click on "Hardware Virtualization"


 3. Create All VMDK for nest
Nutanix CE used - We need create at least 200 GB SSD, and 500 GB HDD for this VM. If you have enough space to use. You can use thick/eager zeroed thick vmdk format. If you don't have such space , you just use thin format . We also need to attach the Nutanix installation gz file. Untar ce-2015.06.08-beta.img.gz , and you will get a ce-2015.06.08-beta.img file around 7.5 GB rename is as "ce-flat.vmdk. Please also download the ce.vmdk from Joep site. Please those two files in same folder.

 4. Start install - Boot up this VM , and you will see the login prompt . "Do not type install first" , just login using root / nutanix/4u jogin as root permission .  You need to modified some files. If you do not edit  those files , you always get some errors. we need to change some installation check files. Those files are .

 4a. go to /home/install/phx_iso/phoenix find one file called minimum_reqs.py , using vi open and edit it. Find the words like
-->
 checkVtd(dmesg)
 checkSSD() 
 checkDiskModels(param_list)
 checkInstallationDiskSize(param_list)

Change into
-->
 checkVtd(dmesg)
 #checkSSD() 
 checkDiskModels(param_list)
 checkInstallationDiskSize(param_list)

 4b. vi the second file "sysUtil.py" , change the value of these two parameter .

 SSD_rdIOPS_thresh = 50

 SSD_wrIOPS_thresh = 50

logout , and you will get login prompt again . type "install" . The installation took you about 5-10 minutes to complete .

5. Change your network setting in ESXi - Please change your vswitch setting , go security and make Promiscuous mode = Accept . Otherwise your CVM can't ping each other .


6. Create your cluster - I suggest using commend line to create cluster will be easier for you . And all the step you need to do.  I found I need to setup all the steps and make Nutanix CE normal .


nutanix@cvm$ cluster -s cvm_ip_addrs1, cvm_ip_addrs2, cvm_ipaddrs3  create

nutanix@cvm$ cluster start

nutanix@cvm$ ncli cluster edit-params new-name=cluster_name

nutanix@cvm$ ncli cluster add-to-name-servers servers="dns_server"

nutanix@cvm$ ncli cluster get-name-servers Configure the NTP servers.

nutanix@cvm$ ncli cluster add-to-ntp-servers servers="ntp_server"

nutanix@cvm$ ncli cluster set-external-ip-address


    After that you could see you have three nodes running in one ESXi Server . Just like this .

and each node almost take 7 GB RAM , and total need is 21 GB around.  See the picture , why I more than 24 GB, because I have one vCenter take 8 GB..


 Any comments please let me know ..

   Albert


2011年2月27日 星期日

Galaxy tab 刷機

我的Galaxy Tab是中華電11月15日第一批出的, 也是我的第一個Android平台. 平常在使用上都很好, 遊戲如憤怒小鳥, 水果忍者, , 應用如Titanium Backup, KK Box, 加上市場, 黑市場, N多市場等眾多資源, 因此Tab反而成了全家人共同使用的手機, 也增加了家裡的樂趣.

也因為Tab, 我才從台灣, 對岸, 或國外的一些網站開始了解Android, 什麼是root, Firmware, 刷機, Market等名詞. Tab使用熟一點後, 發現兩個小不滿, 一個是Samsung Apps一直是空白的, 沒有apps可以下載, 看到有人可以下在NFS Shift,及NOVA, 是蠻羨慕的, 可是也沒有辦法. 另一個是, 檢查Firmware資訊, 電話打 *#1234#, 顯示版本怪怪的, 如下圖:

PDA:
PHONE: P1000ZUJJ2
CSC:

Tab首頁, 設定, 關於手機, 如下圖, 基頻是ZUJJ2


雖然使用上Tab功能都正常, 但看其他人的PDA及CSC都會有顯示相關的版本,而且Tab也有新的台版ROM釋出, 因此產生刷機的想法. 於是看了Mobile01平海大的貼文, samfirmware及國外XDA的許多刷機討論, 瞭解了Tab Firmware的檔案及刷機流程. 我只是初學者, 以下把我瞭解的一些整理出來, 分享給大家.

1. Tab firmware的版本: (可參考i9000類似)
- 主要依地區有分歐美版, 亞洲版, 阿拉伯版等, 再依國家或是電信公司, 及更新版本, 分別以不同的代號代表. 其他的不說, 以台灣版而言, 目前知道有三種代號.
- ZU: 中華電信客制版, 例如P1000ZUJJ2, P1000ZUJK1,.. P1000是Tab的產品代號, JJ2, JK1則是版本編號. 而JK1比JJ2新.
- ZF: 遠傳電信客制版, 例如P1000ZFJK1
- ZT: 台灣open版(不含中華或遠傳的一些客制apps), 例如P1000ZTJK1, P1000ZTJL1, 而JL1比JK1新
- 其他代號如ZH是香港版, DX是東南亞版, XX, XW是歐美版, JP, JV是阿拉伯版

2. Tab firmware檔案內容: (可參考i9000類似)
- 完整版的firmware, 會有PDA, PHONE, CSC三類的檔案, 附檔名以.md5或.tar的壓縮檔, 不完整的Firmware, 就可能只有PDA的檔案. Tab電話打 *#1234# 就會顯示每類的版本.
- PDA: 包含Android OS及附加的系統應用程式, 檔案size會很大, 一般會超過200MB以上
- PHONE: 檔名會內含MODEM字樣, 包含規範無線通訊晶片如何運作的檔案, 無線通訊如Wifi, 藍芽Bluetooth, 3G, GSM, CDMA等等, 無線通訊是跟每個國家或地區使用不同的無線規範相關. 檔案size一般在12MB左右.
- CSC: 是 Carrier Specific Customization簡寫, 檔名會內含CSC字樣, 包含如APN設定, 及跟不同國家或電信公司各自的應用設定. 檔案size一般在12MB-81MB左右.
- 完整firmware跟不完整firmware都可以刷機, 只是步驟會有不同.

以上說明漏漏長, 以下進入刷機實作:

刷機前準備手續:
1. 下載平海大的firmware壓縮檔, 或從對岸的網站找- P1000ZUJK1 及 P1000ZTJL1, 是7z壓縮檔, 要解壓縮.

2. 下載刷機所需軟體(Odin3 v1.7), 及PIT檔(P1_add_hidden.pit). 這兩個檔案可以在網路上找到, 或是到samfirmware.com下載. 注意PIT檔一定要是P1_add_hidden.pit, 不能拿其他名字的pit檔代替. PIT檔的作用, 相當於是Windows系統對硬碟進行分區partition. 用錯了就會刷機失敗.

3. Tab要先root, 可用z4root來做. z4root目前在market上已經沒有, 檔案如附件. 要root的目的是要安裝Titanium Backup做程式及資料備份.
附加壓縮檔: 201012/mobile01-99ea44c8fd9d08bd63bd19c9c12998d7.zip

4. 從Market下載Titanium Backup免費版安裝, 在偏好設定的備份設定, 將”備份資料夾名稱”更改為外部SD卡(原資料夾前要加上/external_sd/), 備份時選”所有應用程式與系統資料”. 如果不更改, 預設會備份到內部SD卡上. 改好後先批次備份一次, 然後看看外部SD卡有沒有TitaniumBackup資料夾內有沒有檔案, 就知道有沒有成功. 等刷機完成後, 再用Titanium Backup將應用程式及資料還原安裝回去Tab. 請看下圖 External Storage及備份目錄的地方.


5. 我的打算是將ZUJJ2中華電信版升級刷為ZUJK1中華電信版, 再刷為ZTJL1台灣open版.

補充: 請看我最底下12/23補充2, 刷機前先備份 efs 資料夾, 以免發生刷機失敗 imei 碼不見的情形. 我刷機前是沒做, 還好刷完後imei還在.

刷機過程:
1. Tab先充好電, 首頁, 設定, SD卡和行動電話儲存空間, 卸載SD卡, 來將外部SD卡卸載, 關機後將外部SD卡拿出.

2. 開機做hard reset回復出廠設定(首頁, 設定, 隱私設定, 重設為原廠設定, 或是電話 *2767*3855#), 這個步驟沒做應該也行, 我是要先把檔案清乾淨.

3. 在PC上把刷機軟體Odin3 v1.7及P1000ZUJK1的檔案放在同一資料夾下, 一共有5個檔案: Odin3 v1.7.exe, P1_add_hidden.pit, P1000ZUJK1-REV03-ALL-CL712217.tar.md5, MODEM_P1000ZUJK1_REV_00_CL644164.tar.md5, 及GT-P1000-CSC-CWTJJ3.tar.md5

4. 依照平海大介紹的步驟(http://www.mobile01.com/topicdetail.php?f=568&t=1899849)
- 此時Tab先不連上PC, 在PC上開啟Odin3 刷機軟體, 在Re-partition, Auto Reboot, F. Reset Time打勾, 然後點PIT, 選P1_add_hidden.pit
- PDA選P1000ZUJK1-REV03-ALL-CL712217.tar.md5)
- PHONE選MODEM_P1000ZUJK1_REV_00_CL644164.tar.md5
- CSC選GT-P1000-CSC-CWTJJ3.tar.md5
- 在Tab上同時壓下”音量下鍵”+”開機鍵”,進入”Download mode”, 然後將Tab接上電腦USB
- 等到Odin3抓到COM port後(COM port #視電腦而不同), 按Start開始刷機, 過2-3分鐘後就刷好了.
- 刷機完成出現PASS後, Tab跟電腦斷開, 再做一次hard reset *2767*3855#, reset後輸入*#1234#來確認升級後的版本

5. 我刷好ZUJK1中華電信版後的圖如下:
- 電話 *#1234#, 查詢升級後的版本

- 關於手機的圖, 基頻是ZUJK1

- 首頁的圖, 中間右方有中華電Hami widgets

- 程式頁面, 最上方有四個Hami的widgets

- 點Samsung Apps出現有9個apps可以下載, 其中有NFS Shift, NOVA. 終於可以下載了


6. 接著繼續把ZUJK1刷成ZTJL1(試驗性質, 要把Hami widgets拿掉). 在PC上把刷機軟體Odin3 v1.7及P1000ZTJL1的檔案放在同一資料夾下, 一共有4個檔案: Odin3 v1.7.exe, GT-P1000-CSC-BRIJJ1.tar.md5, MODEM_P1000ZTJL1_REV_00_CL614387.tar.md5, P1000ZTJK1-REV03-ALL-CL712217.tar.md5. 此處沒有P1_add_hidden.pit, 因為在刷ZUJK1時, 已經做過了分區re-partition, 不需要再重做.

7. 刷ZTJL1步驟:
- 此時Tab先不連上PC, 在PC上開啟Odin3 刷機軟體, 因為沒有PIT檔, 所以Re-partition不要打勾, 在Auto Reboot, F. Reset Time打勾. 切記沒有pit檔時, 如果Re-partition打勾, 就會刷機失敗.
- PDA選P1000ZTJK1-REV03-ALL-CL712217.tar.md5
- PHONE選MODEM_P1000ZTJL1_REV_00_CL614387.tar.md5
- CSC選GT-P1000-CSC-BRIJJ1.tar.md5
- 在Tab同時壓下”音量下鍵”+”開機鍵”,進入”Download mode”, 然後將Tab接上電腦USB
- 等到Odin3抓到COM port後(COM port #視電腦而不同), 按Start開始刷機, 過2-3分鐘後就刷好了.
- 刷機完成出現PASS後, Tab跟電腦斷開, 再做一次hard reset *2767*3855#, reset後輸入*#1234#來確認升級後的版本

8. 刷好ZTJL1台灣open版後的圖如下:
- 電話 *#1234#, 查詢升級後的版本

- 關於手機的圖, 基頻是ZTJL1

- 首頁的圖, 沒有中華電Hami widget

- 程式頁面, 上方已經沒有Hami的widget

- 點Samsung Apps出現有9個apps可以下載, 跟刷ZUJK1一樣


9. 程式及資料回復 - 刷好新firmware後, 把外部SD卡插回Tab上, root Tab(使用z4root), 從market下載Titanium Backup免費版安裝, 把”備份資料夾名稱”改到外部SD卡的TitaniumBackup資料夾, 然後按“備份/還原”, 就會列出所有已經備份的程式, 找到你要還原的程式, 輕輕點擊就可以把程式及資料安裝還原回去.

以上是Tab初學者對刷機的研究及實作分享, 大家鼓勵鼓勵.
---------------------------------
12/22補充: 其實是可以直接刷到ZTJL1, 不用中間多刷ZUJK1的. 不過直接刷ZTJL1時, 要用刷ZUJK1的方式.

12/23補充1: 刷完後, 感覺使用上差別不大, 跑Quadrant Standard 是1012, 可能要OCLF後才會更快(arickwu大的分數2244), 重點是 Samsung Apps 終於可以下載遊戲 NFS Shift, 跟NOVA, 這可是免費的.

12/23補充2: 看 macleod 大回文提醒, 及參考 XDA 上 i9000 刷機 efs 備份 的貼文, 最好先備份Tab上 efs 資料夾到外部SD卡上, 以免發生刷機失敗 imei 碼不見的情形. 我自己刷機前是沒有做, 還好 imei 還在. 亡羊補牢, 趕快做備份, 步驟如下:
- 電話打 *#06#, 會顯示imei碼, 一共15碼.
- Tab要root, 到 market 下載 rootexplorer, 或是對岸漢化後叫 R.E.管理器安裝
- 在根目錄下就會看到 efs 資料夾, 按 efs 久一些, 會出現選項, 選copy, 然後下拉到 sdcard 資料夾下, external_sd 資料夾, 點 paste, 就會copy到外部SD卡上.

12/23補充3: 預備安裝OCLF, 讓Tab操作更順. 可到 此 blog , 參考安裝過程, 也還蠻簡單的.
- 在先安裝好Ext2 tools後, 要再按Available做第二步OCLF安裝, 要等幾分鐘, Tab會自動重啟.
- 我安裝後跑 Quadrant Standard, 效能分數由安裝前是1012, 提高到2083.
- 如果以後還要再重新刷機, 需要記得先把 OCLF 反安裝才能去刷機

2011年2月16日 星期三

Linux without rescan disk

As a system admin, I need to use additional hard drives for to provide more storage space or to separate system data from user data. This procedure, adding physical block devices to virtualized guests, describes how to add a hard drive on the host to a virtualized guest using VMWare software running Linux as guest.

It is possible to add or remove a SCSI device explicitly, or to re-scan an entire SCSI bus without rebooting a running Linux VM guest. This how to is tested under Vmware Server and Vmware Workstation v6.0 (but should work with older version too). All instructions are tested on RHEL, Fedora, CentOS and Ubuntu Linux guest / hosts operating systems.

Step # 1: Add a New Disk To Vm Guest

First, you need to add hard disk by visiting vmware hardware settings menu.
Click on VM > Settings

Fig.01: Vmware Virtual Machine Settings

Fig.01: Vmware Virtual Machine Settings

Alternatively you can press CTRL + D to bring settings dialog box.

Click on Add+ to add new hardware to guest:

Fig.02: VMWare adding a new hardware

Fig.02: VMWare adding a new hardware

Select hardware type Hard disk and click on Next

Fig.03 VMware Adding a new disk wizard

Fig.03 VMware Adding a new disk wizard

Select create a new virtual disk and click on Next

Fig.04: Vmware Wizard Disk

Fig.04: Vmware Wizard Disk

Set virtual disk type to SCSI and click on Next

Fig.05: Vmware Virtual Disk

Fig.05: Vmware Virtual Disk

Set maximum disk size as per your requirements and click on Next

Fig.06: Finalizing Disk Virtual Addition

Fig.06: Finalizing Disk Virtual Addition

Finally, set file location and click on Finish.

Step # 2: Rescan the SCSI Bus to Add a SCSI Device Without rebooting the VM

A rescan can be issued by typing the following command:
echo "- - -" > /sys/class/scsi_host/host#/scan
fdisk -l
tail -f /var/log/message

Sample outputs:

Linux Vmware Rescan New Scsi Disk Without Reboot

Fig.01:Linux Vmware Rescan New Scsi Disk Without Reboot


Replace host# with actual value such as host0. You can find scsi_host value using the following command:
# ls /sys/class/scsi_host

2010年12月1日 星期三

NTFS comparison table

NTFS vs FAT

Criteria

NTFS5

NTFS

exFAT

FAT32

FAT16

FAT12

Operating System

Windows 2000
Windows XP
Windows 2003 Server
Windows 2008
Windows Vista
Windows 7

Windows NT
Windows 2000
Windows XP
Windows 2003 Server
Windows 2008Windows Vista
Windows 7

Windows CE 6.0
Windows Vista SP1
Windows 7
WinXP+KB955704

DOS v7 and higher
Windows 98
Windows ME
Windows 2000
Windows XP
Windows 2003 Server
Windows Vista
Windows 7

DOS
All versions of
Microsoft Windows

DOS
All versions of
Microsoft Windows

Limitations

Max Volume Size

264 clusters minus 1 cluster

232 clusters minus 1 cluster

128PB

32GB for all OS.
2TB for some OS

2GB for all OS.
4GB for some OS

16MB

Max Files on Volume

4,294,967,295 (232-1)

4,294,967,295 (232-1)

Nearly Unlimited

4194304

65536


Max File Size

264 bytes (16 ExaBytes)
minus 1KB

244 bytes (16 TeraBytes)
minus 64KB

16EB

4GB minus 2 Bytes

2GB (Limit Only
by Volume Size)

16MB (Limit Only
by Volume Size)

Max Clusters Number

264 clusters minus 1 cluster

232 clusters minus 1 cluster

4294967295

4177918

65520

4080

Max File Name Length

Up to 255

Up to 255

Up to 255

Up to 255

Standard - 8.3
Extended - up to 255

Up to 254

File System Features

Unicode File Names

Unicode
Character Set

Unicode
Character Set

Unicode
Character Set

System
Character Set

System
Character Set

System
Character Set

System Records Mirror

MFT Mirror File

MFT Mirror File

No

Second Copy of FAT

Second Copy of FAT

Second Copy of FAT

Boot Sector Location

First and Last Sectors

First and Last Sectors

Sectors 0 to 11
Copy in 12 to 23

First Sector and
Copy in Sector #6

First Sector

First Sector

File Attributes

Standard and Custom

Standard and Custom

Standard Set

Standard Set

Standard Set

Standard Set

Alternate Streams

Yes

Yes

No

No

No

No

Compression

Yes

Yes

No

No

No

No

Encryption

Yes

No

No

No

No

No

Object Permissions

Yes

Yes

Yes

No

No

No

Disk Quotas

Yes

No

No

No

No

No

Sparse Files

Yes

No

No

No

No

No

Reparse Points

Yes

No

No

No

No

No

Volume Mount Points

Yes

No

No

No

No

No

Overall Performance

Built-In Security

Yes

Yes

Yes
minimal ACL only

No

No

No

Recoverability

Yes

Yes

Yes
if TFAT activated

No

No

No

Performance

Low on small volumes
High on Large

Low on small volumes
High on Large

High

High on small volumes
Low on large

Highest on small volumes
Low on large

High

Disk Space Economy

Max

Max

Max

Average

Minimal on large volumes

Max

Fault Tolerance

Max

Max

Yes
if TFAT activated

Minimal

Average

Average